Do you want to create a Deep Learning API and integrate it into your website? Follow the step-by-step process to create, deploy and host your API templates with Flask!
By Axel SALA-MARTIN, Data Scientist at LittleBigCode

When working on a Machine Learning (ML) project, it’s important to proceed in stages. First, the data is explored and then the appropriate model and pre-processing is chosen. Then you train and test until you reach the desired performance. And finally, the model is deployed for use on a website or application.
However, you can’t use a laptop and unless the web application is based on Django, it’s unlikely to be written in Python. So how do you deploy this model as an API and then call it from an application?
One option is to move the model to a web service. In this way, the web application written in HTML and JavaScript will be able to access the model via an HTTP request communicating with the Flask Web Service Python.
Here are the steps we will follow to create a Deep Learning API :
- Create your model
- Install and launch Flask
- Exchange data and host your model with Flask
- Create a front-end web application to communicate with the API
- Strengthening data security and confidentiality
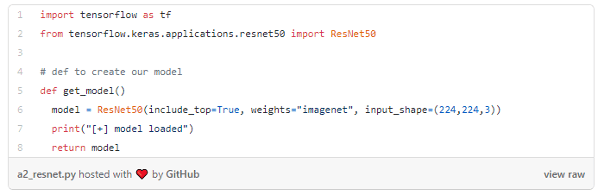
1. Create your model
In this article we will simply take a pre-trained model of Keras so that we can concentrate on the following sections. We will use the famous Resnet50 trained on ImageNet data and which integrates no less than a thousand classes.
2. Install and launch Flask
First of all, here are 2 ways to install Flask in a Python environment:
pip install flask# option 2 : conda
conda install -c anaconda flask
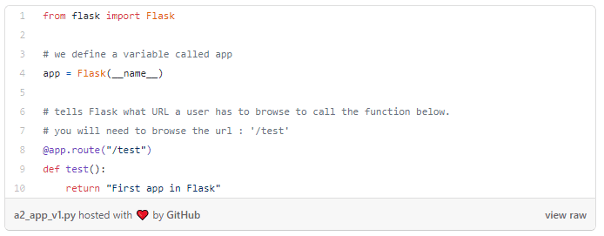
Next, you need to create a basic application that would display a text like “First application in Flask” at the URL path: “/ test”. The idea is simply to see if the installation is working properly. Here the structure of the project :
app.py
And here is the resulting app.py :
Then open your terminal and go to the “flask_applications /” folder to execute this command (Windows equivalent):
export FLASK_APP=app.py# then launch it
flask run –host=0.0.0.0
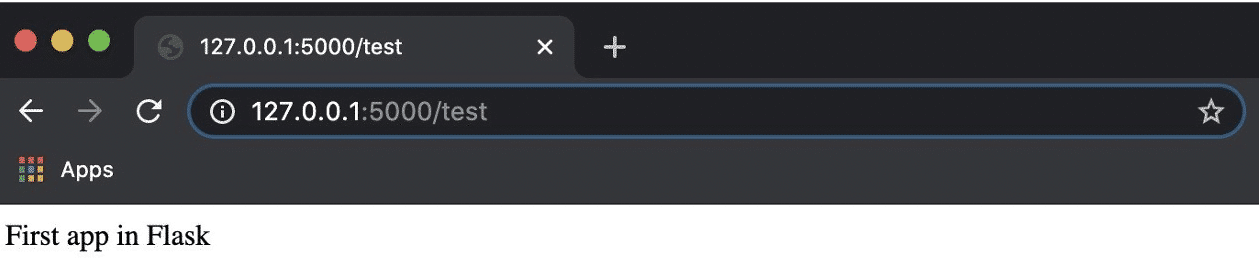
Choose your preferred browser and access the address displayed on your terminal:
http://127.0.0.1:5000. Now go to the URL enabling the “test” function and add the extension ” < / text > “
Now you have created your first app! A good thing done but still rather useless for the moment…
3. Exchange data and host your model with Flask
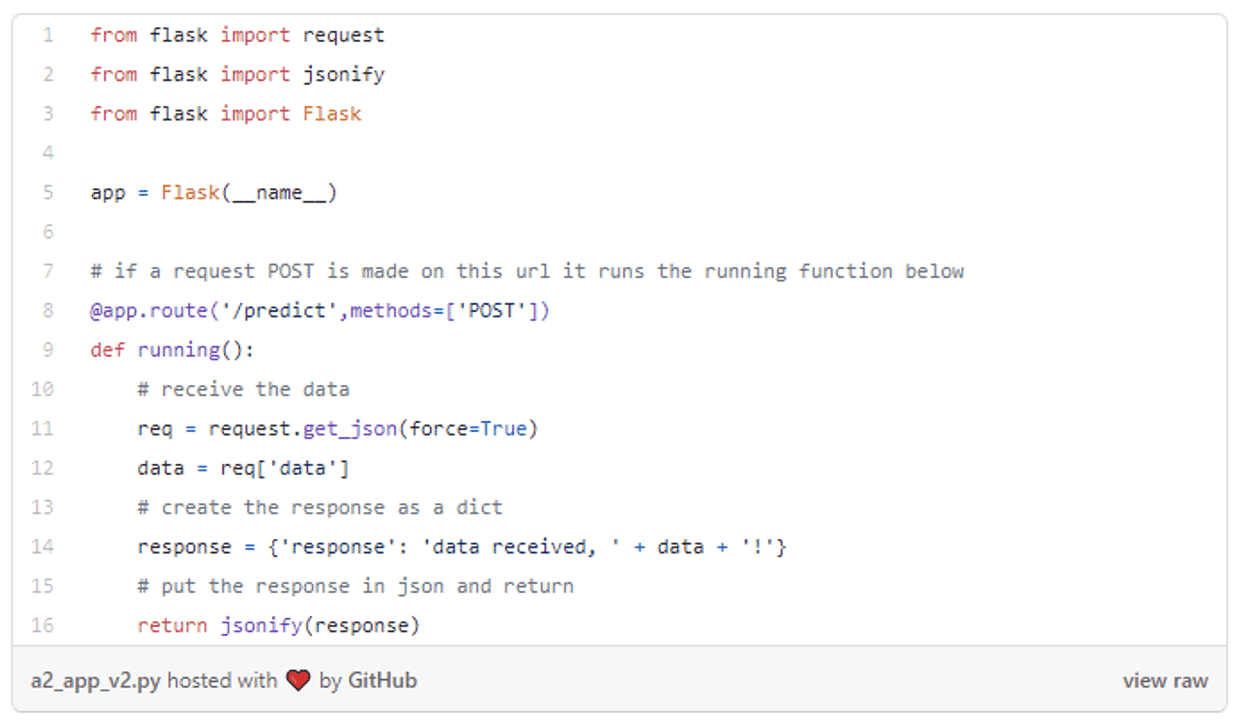
3.1 How to share data with Flask
The objective here is to create a Flask application that will behave like the back-end of your web application. The Flask application must therefore be able to receive an image from an HTTP publishing request. It must also return the results in Json format. For this purpose, we will use two additional libraries :
- “request” to retrieve data from post request ;
- And “jsonify” to convert the result to json format.
Here is the updated app.py:
The purpose of the application is to take images as input and transmit them through the model. So you have to change the app.py again 😉
3.2 Hosting your API model with Flask
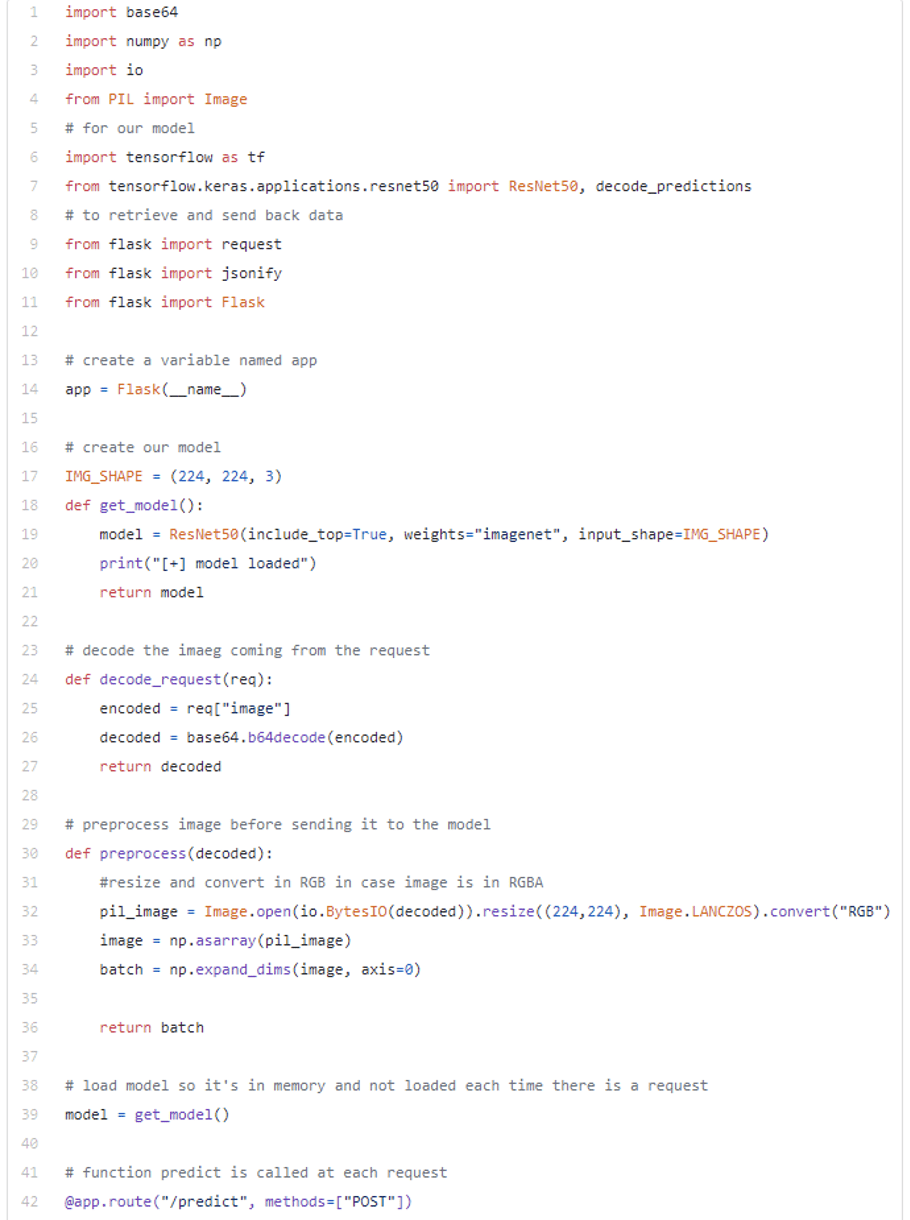
The data obtained from the publication request is represented as an image. Now, in order to define the image prediction, we need to feed this image to the ResNet50.
Once this is done, Flask stores the results as a dictionary converted to Json format before sending them back. This is what you get with this new app.py version:
Your back-end is finished! Next step: create a front-end web application to communicate with the Flask application.
4. Create a front-end web application to communicate with the API
First, you need to add an additional file to the :
app.py
static/
app.html
The app.html should simply consist of :
- An input to download the image;
- A button to click and activate a script to call the Flask application;
- A paragraph to display the result of the prediction ;
- An image item to display the downloaded image;
- And of course, the script that communicates with the Flask. This script also updates the paragraph text with the prediction and the visual element with the uploaded image.
As a result, you can now launch the application as described above and access http://0.0.0.0:5000/static/app.html . As a result, you should get a web page similar to this one :
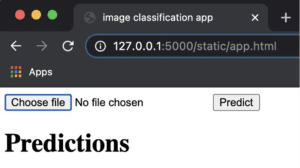
Upload an image file in “.png” and click on “predict”.
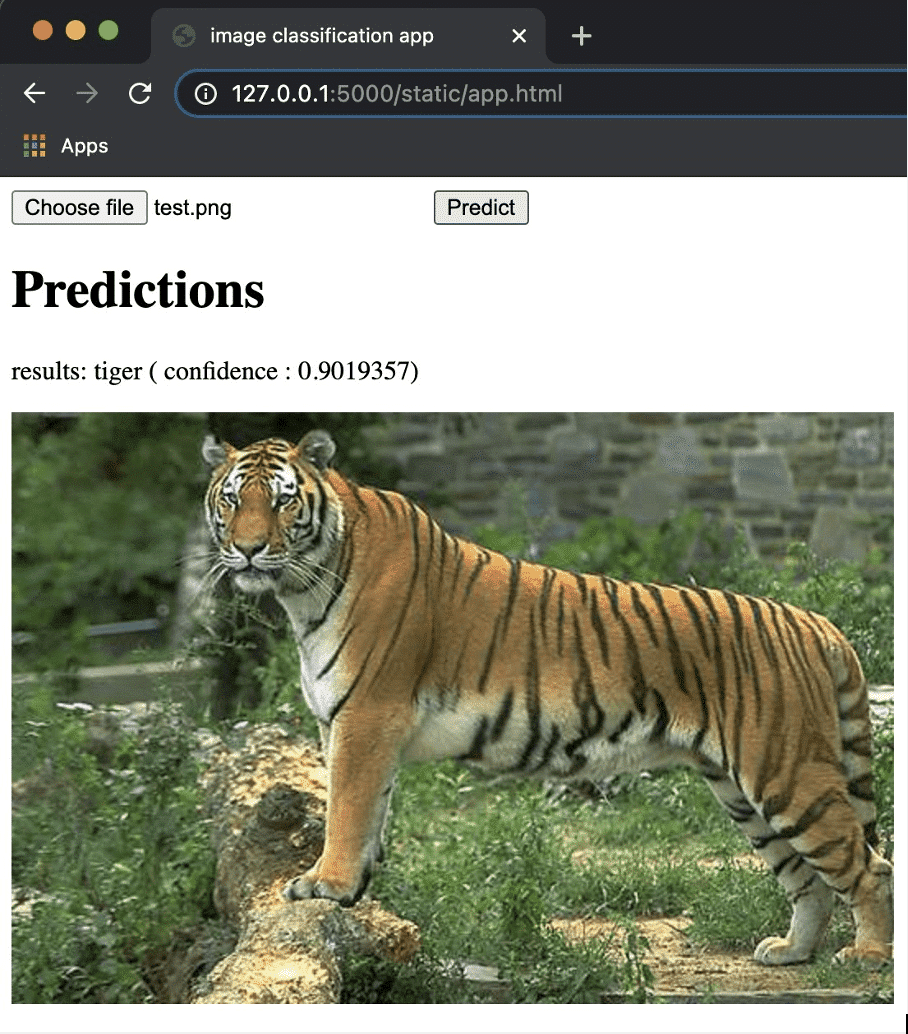
And that’s it ! Sure, the layout isn’t the most aesthetically pleasing, but you’ve just used your model via the web and by calling your Flask application. In short, you have created your first deep learning API. Congratulations to those who have made it this far !
5. Strengthen data security and confidentiality
In summary, we have downloaded an image and sent it via an HTTP Post request to the Flask application. After processing it, we returned the results as a Json to the front end. The web page was then able to display the answer.
It should be noted, however, that in this example only an image containing no important information was sent. But what would happen if private data, for example from an ID card or driving licence, were sent? No one would want to take any risks ! So what if, instead of sending the data over the network, it was held locally and only the model was sent to run in this front-end application ? This way, everything would work directly in the browser. In this way, the information could be transmitted to the model directly in the browser and would not have to pass through the network.
How can this be achieved? Using the TensorFlow.js library and running the model in JavaScript. To be discussed in a future article !